Setting Up Your GitHub Account
If you’re unfamiliar with GitHub or think it sounds too technical or complicated, don’t worry.
For our purposes, it’s a fantastic online service that will store your site’s data and host your static website for the public to see.
A step-by-step guide to creating a GitHub account
Go to the GitHub website
Open your browser, navigate to https://github.com, and click the “Sign Up” button.

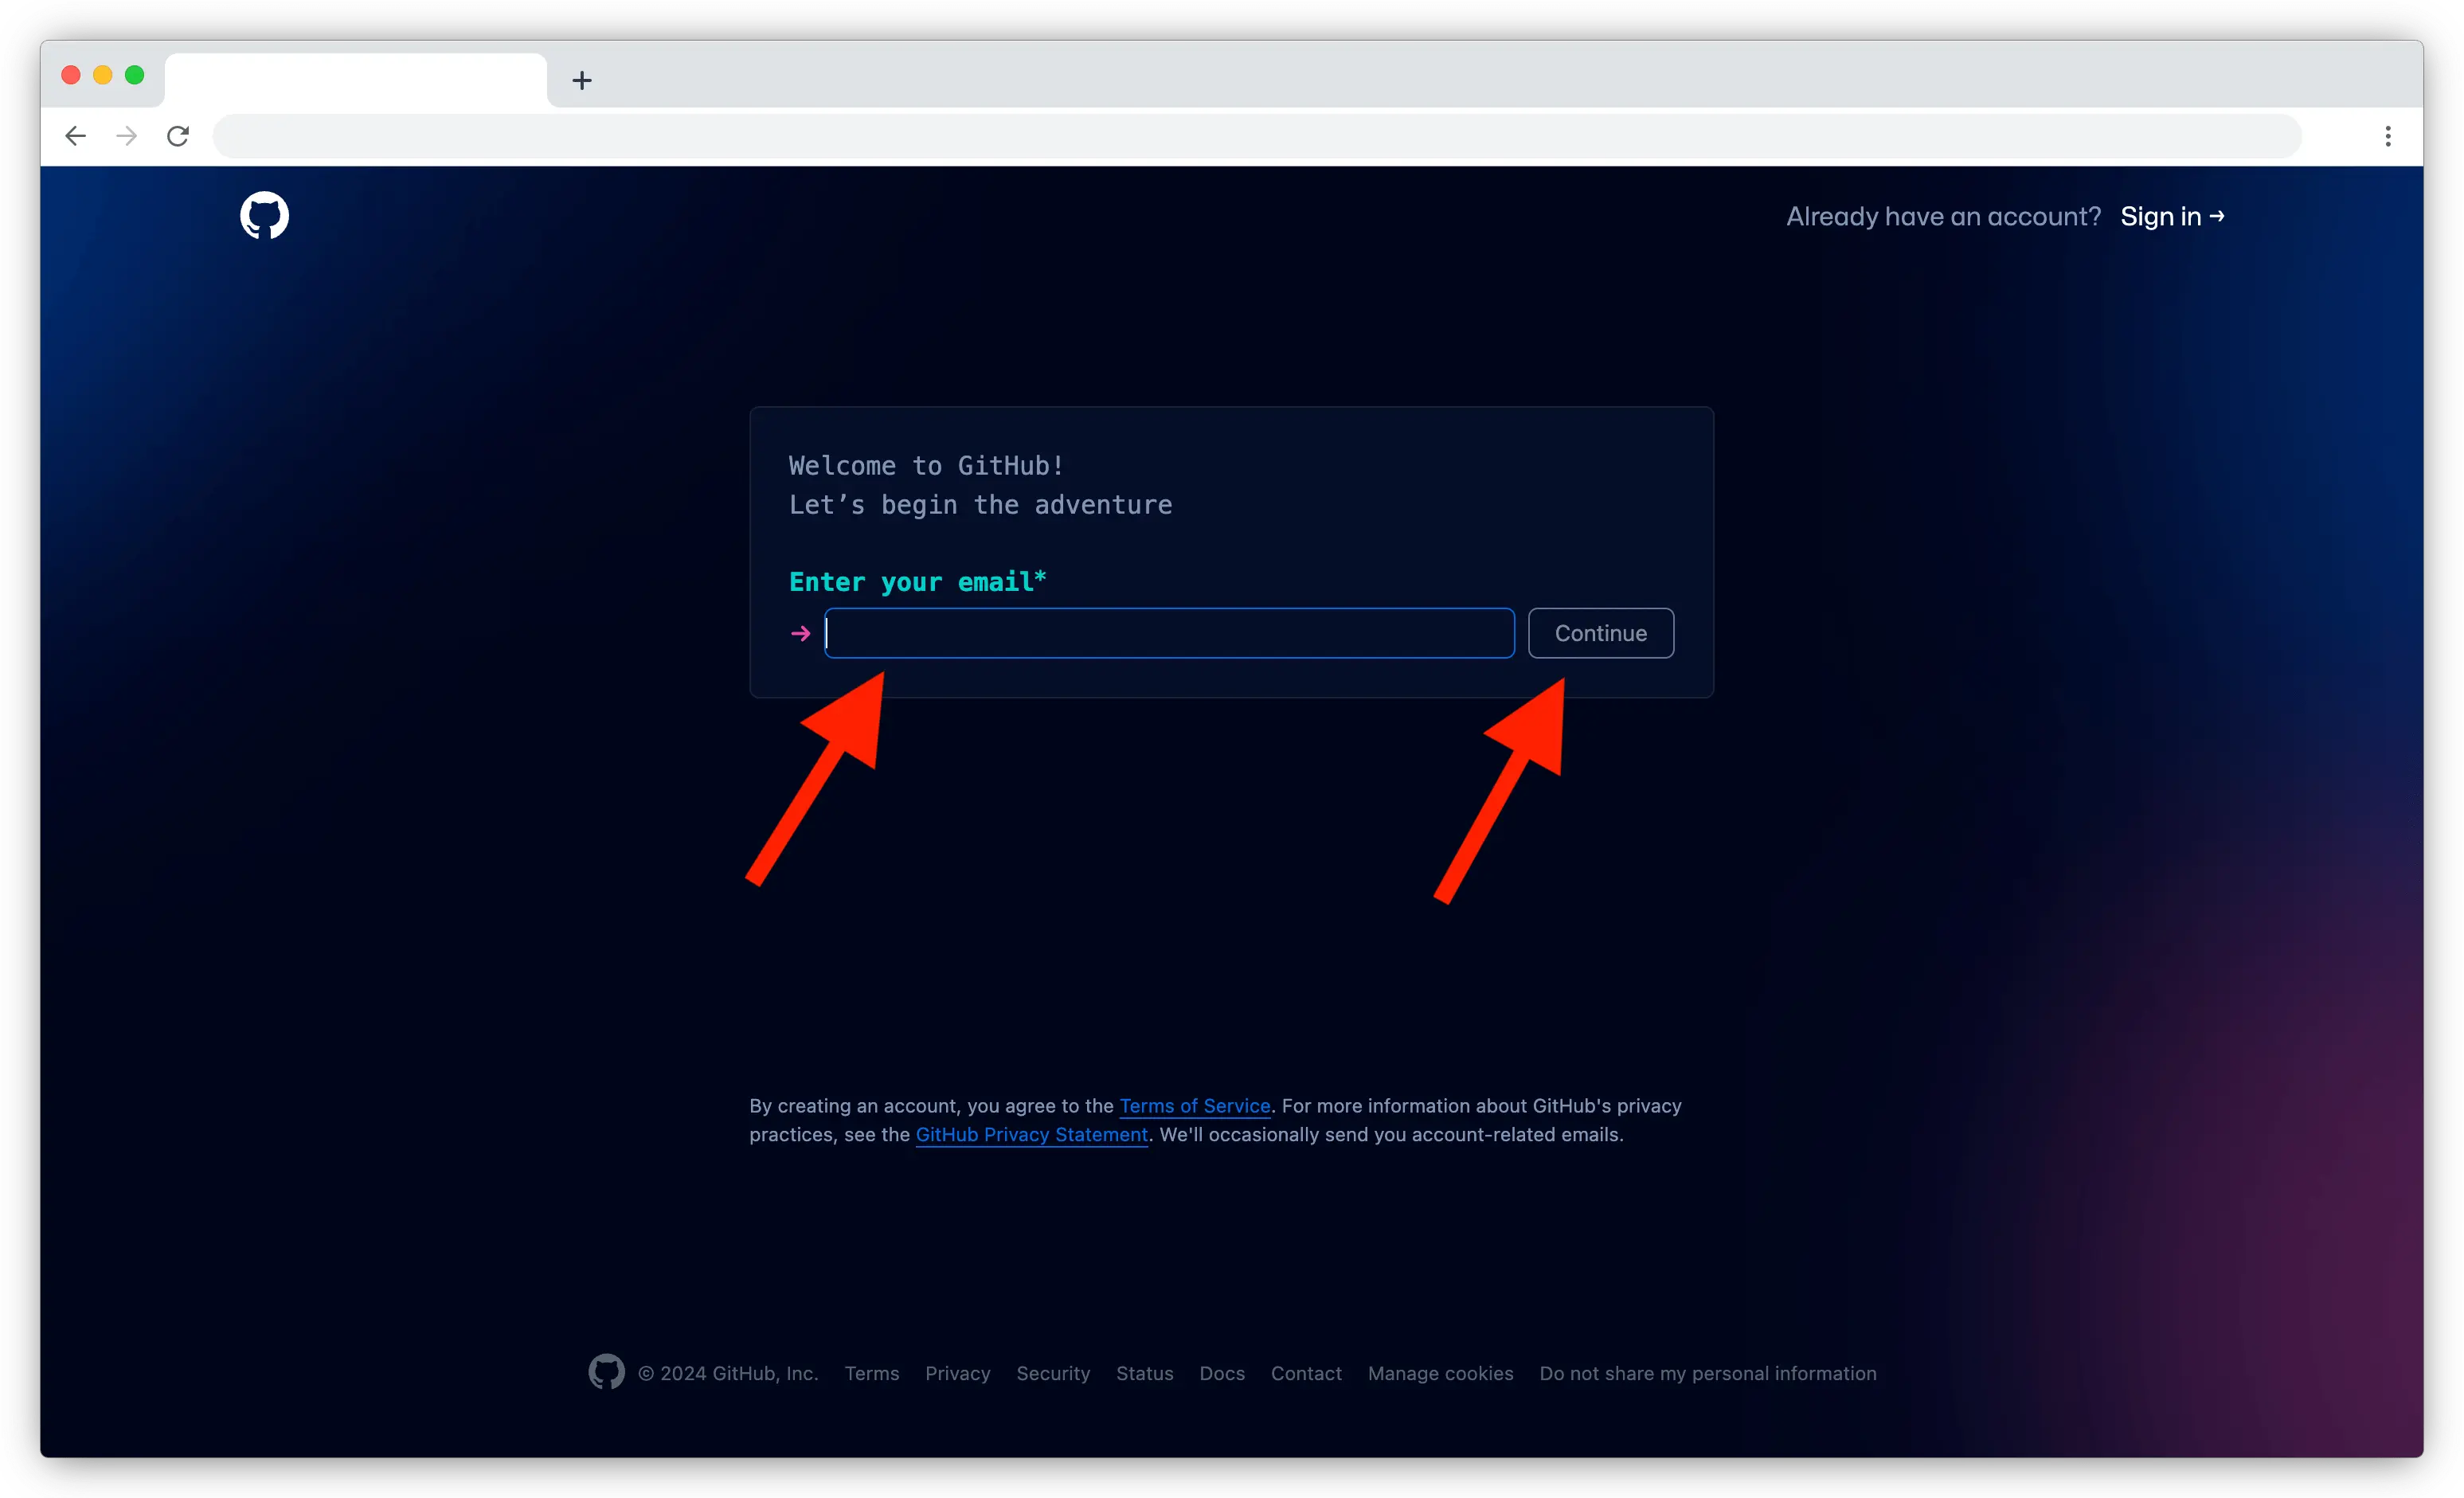
Enter your email address
On the sign-up page, type your email address into the field labeled “Enter your email” and click “Continue”.
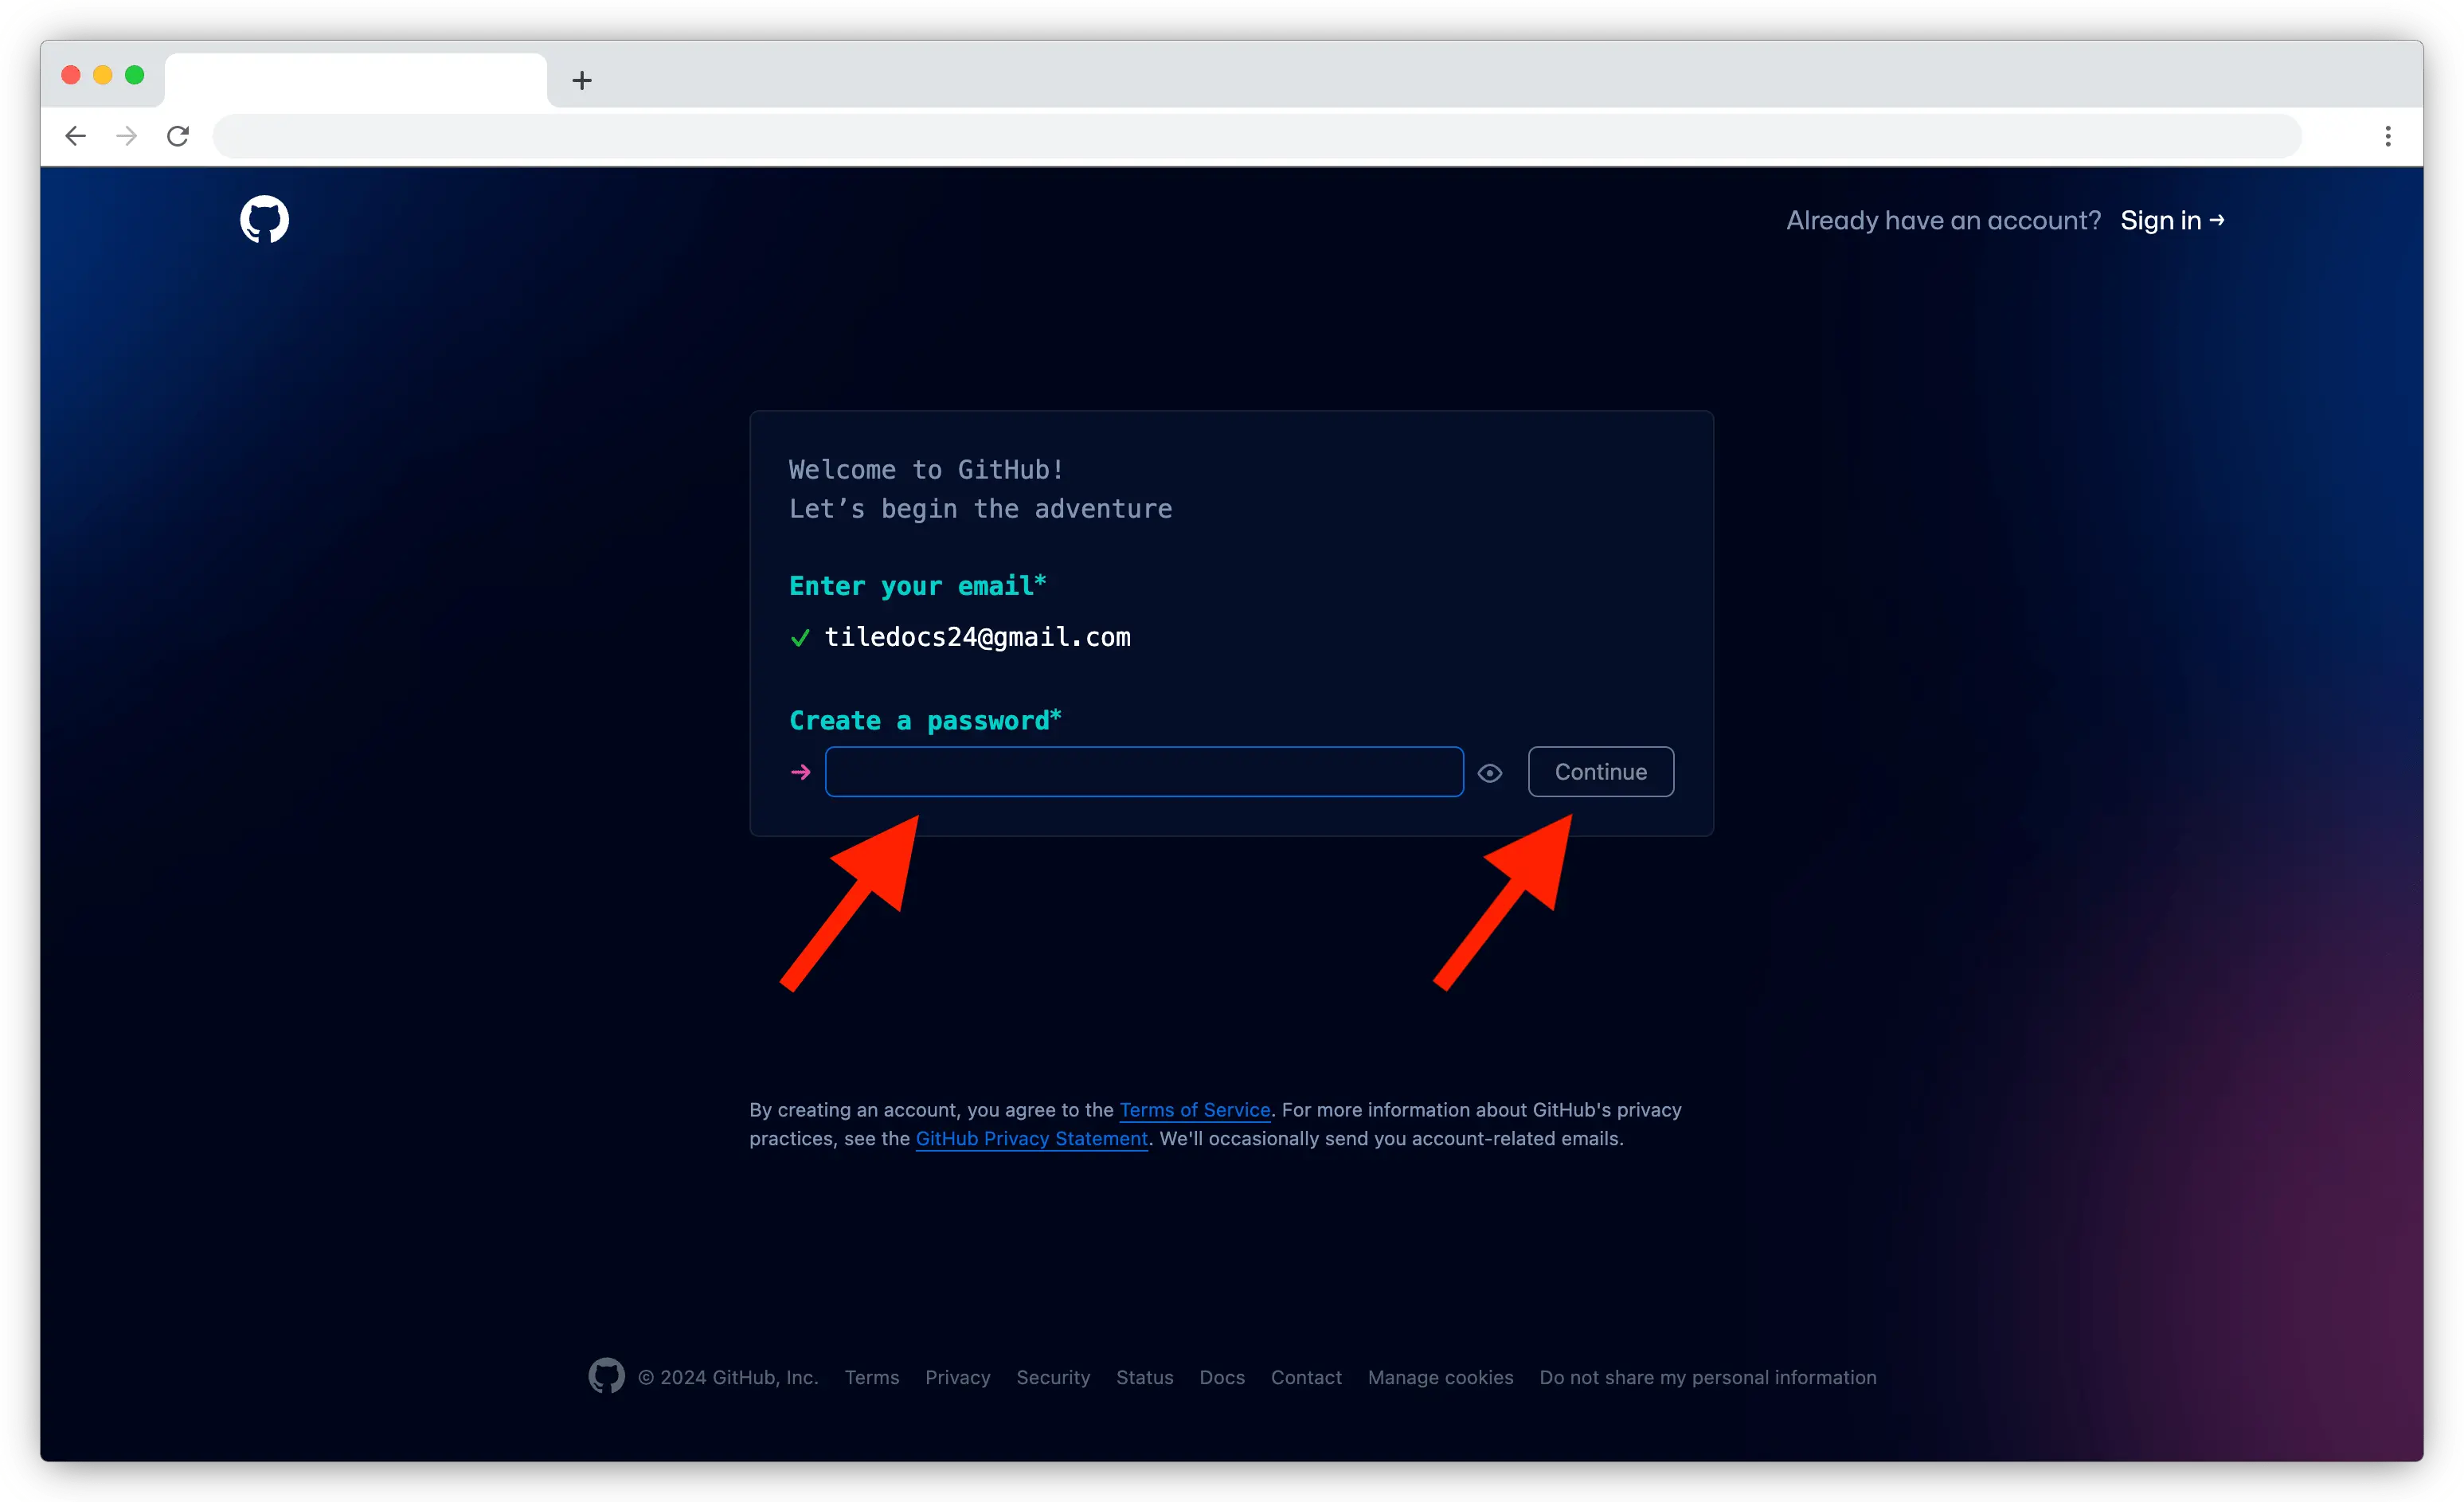
Create a password
A new field labeled “Create a password” will appear. Enter a password you’ll remember, then click “Continue”.
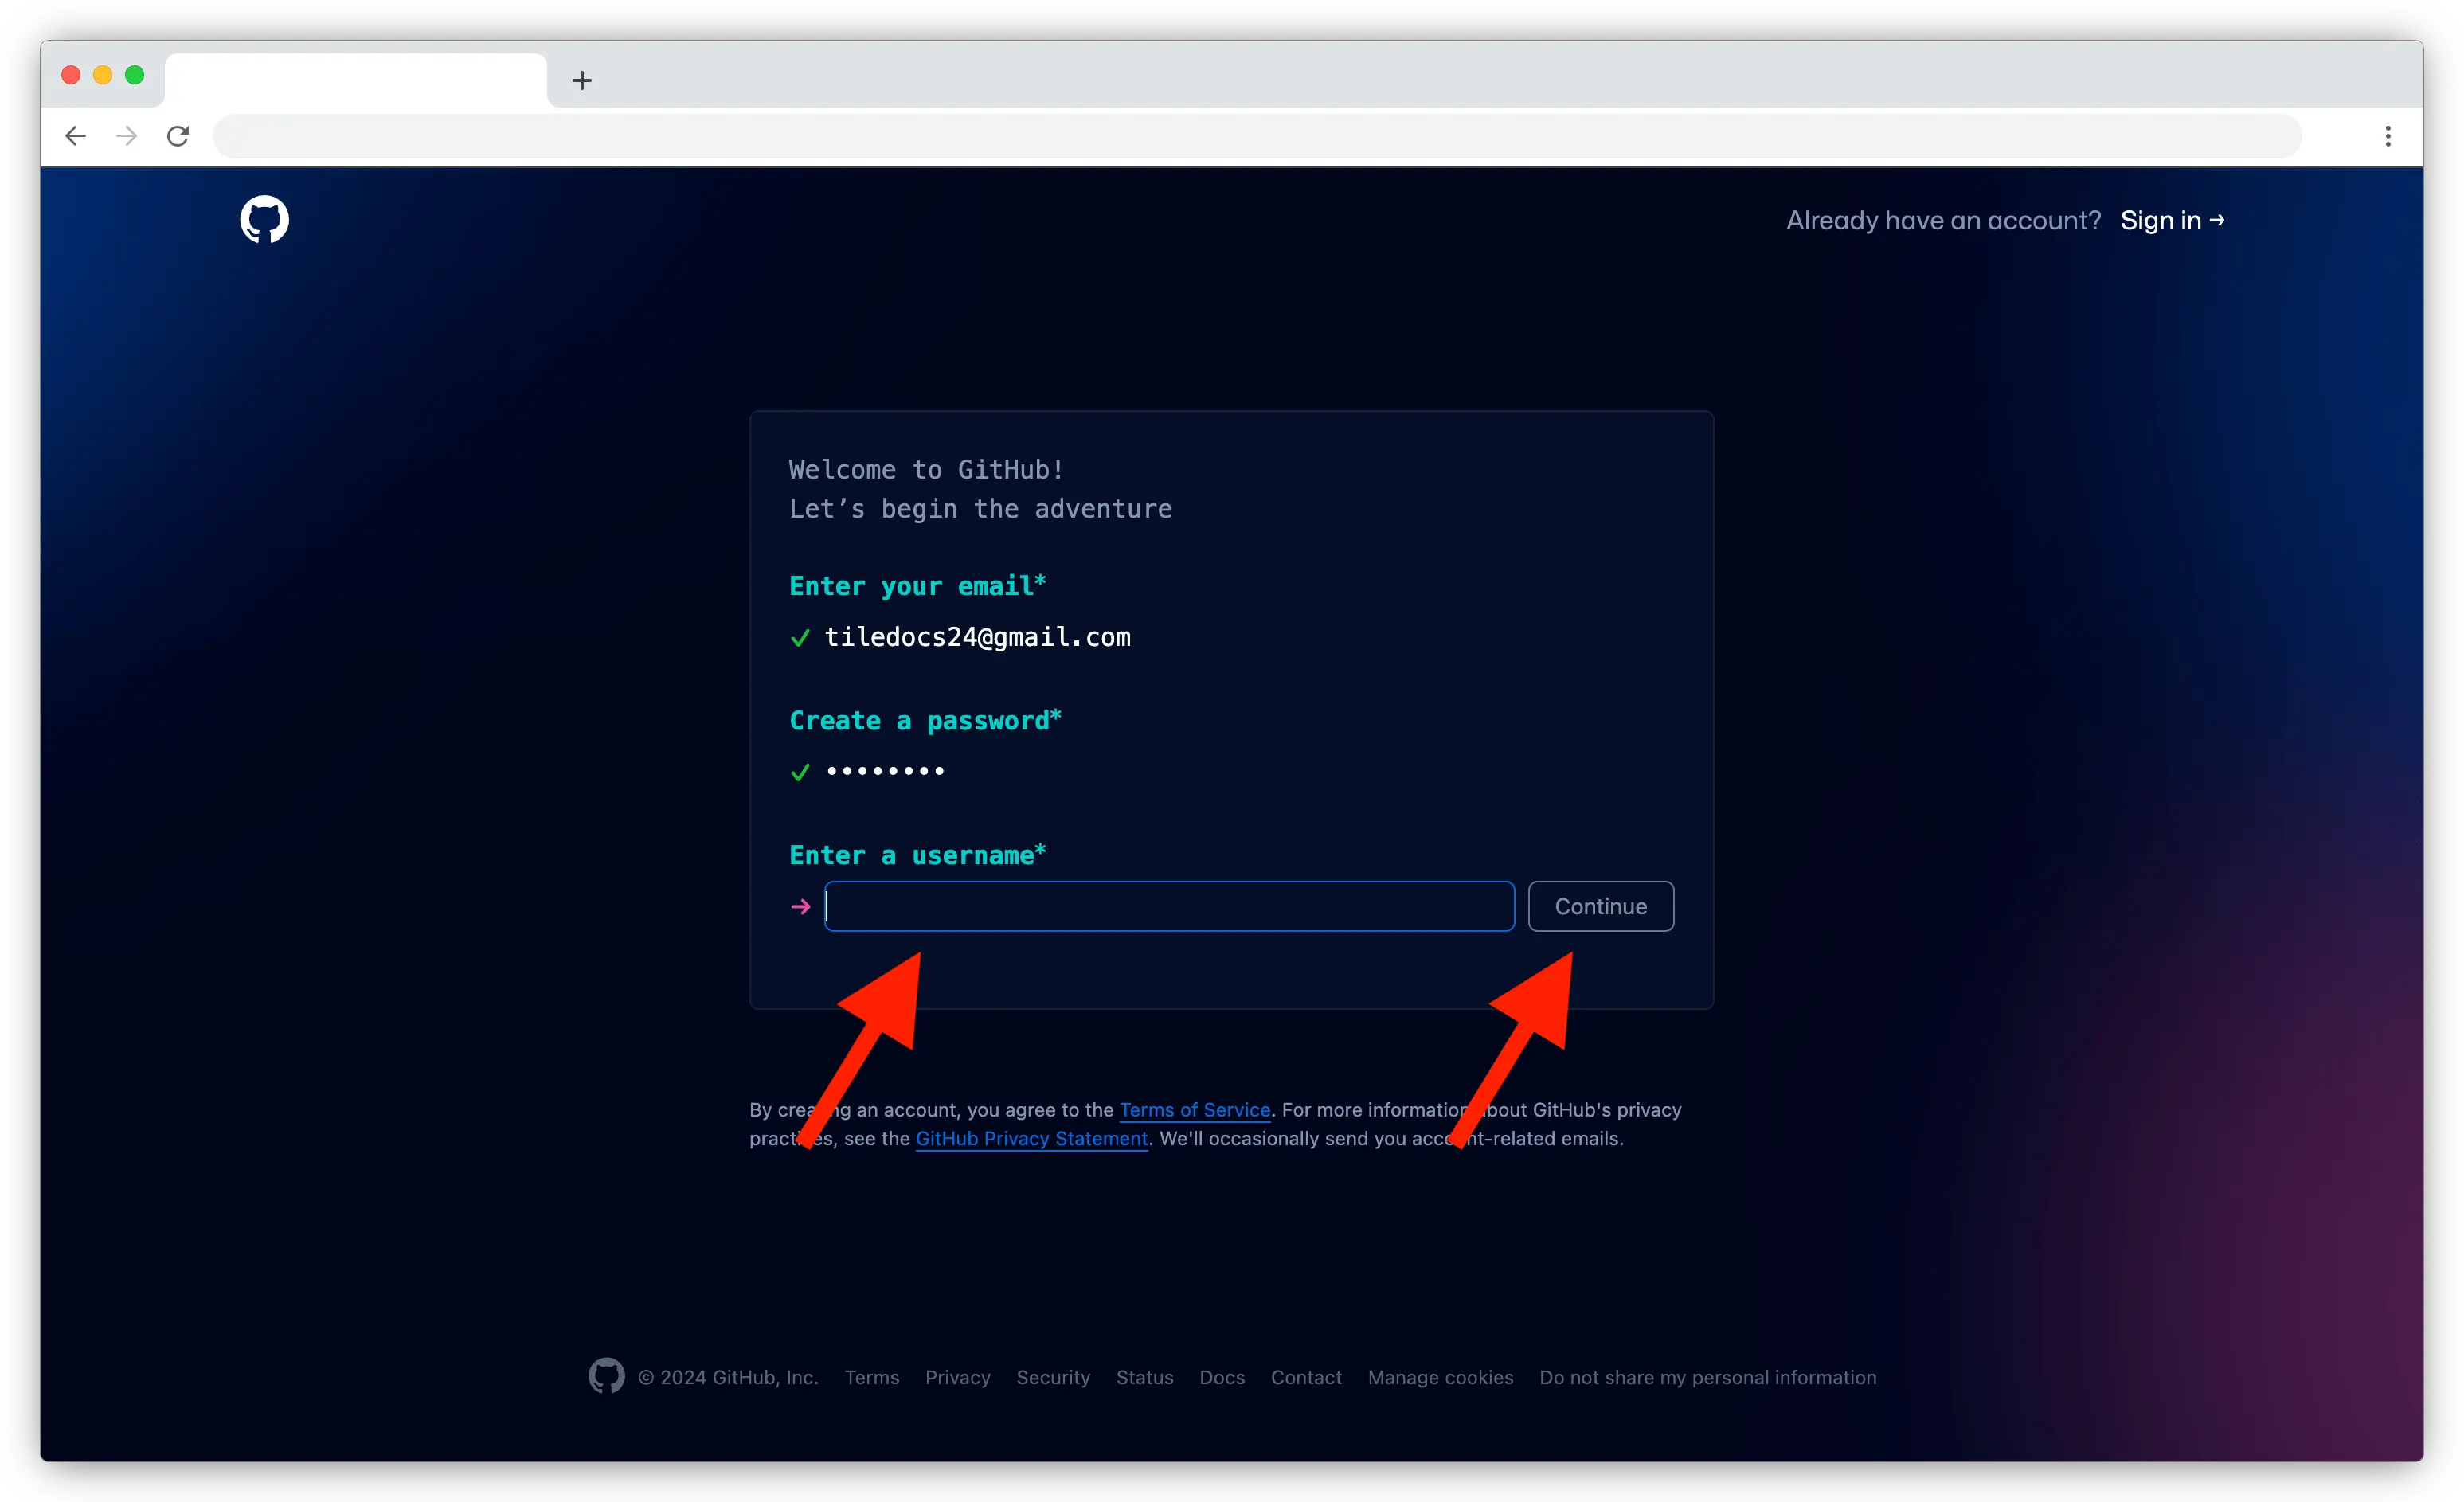
Choose a username
You’ll be asked to pick a username. This step might be tricky because many usernames are already taken. Choose something appropriate, as it will appear in your site’s URL, like this:https://account-name.github.io.
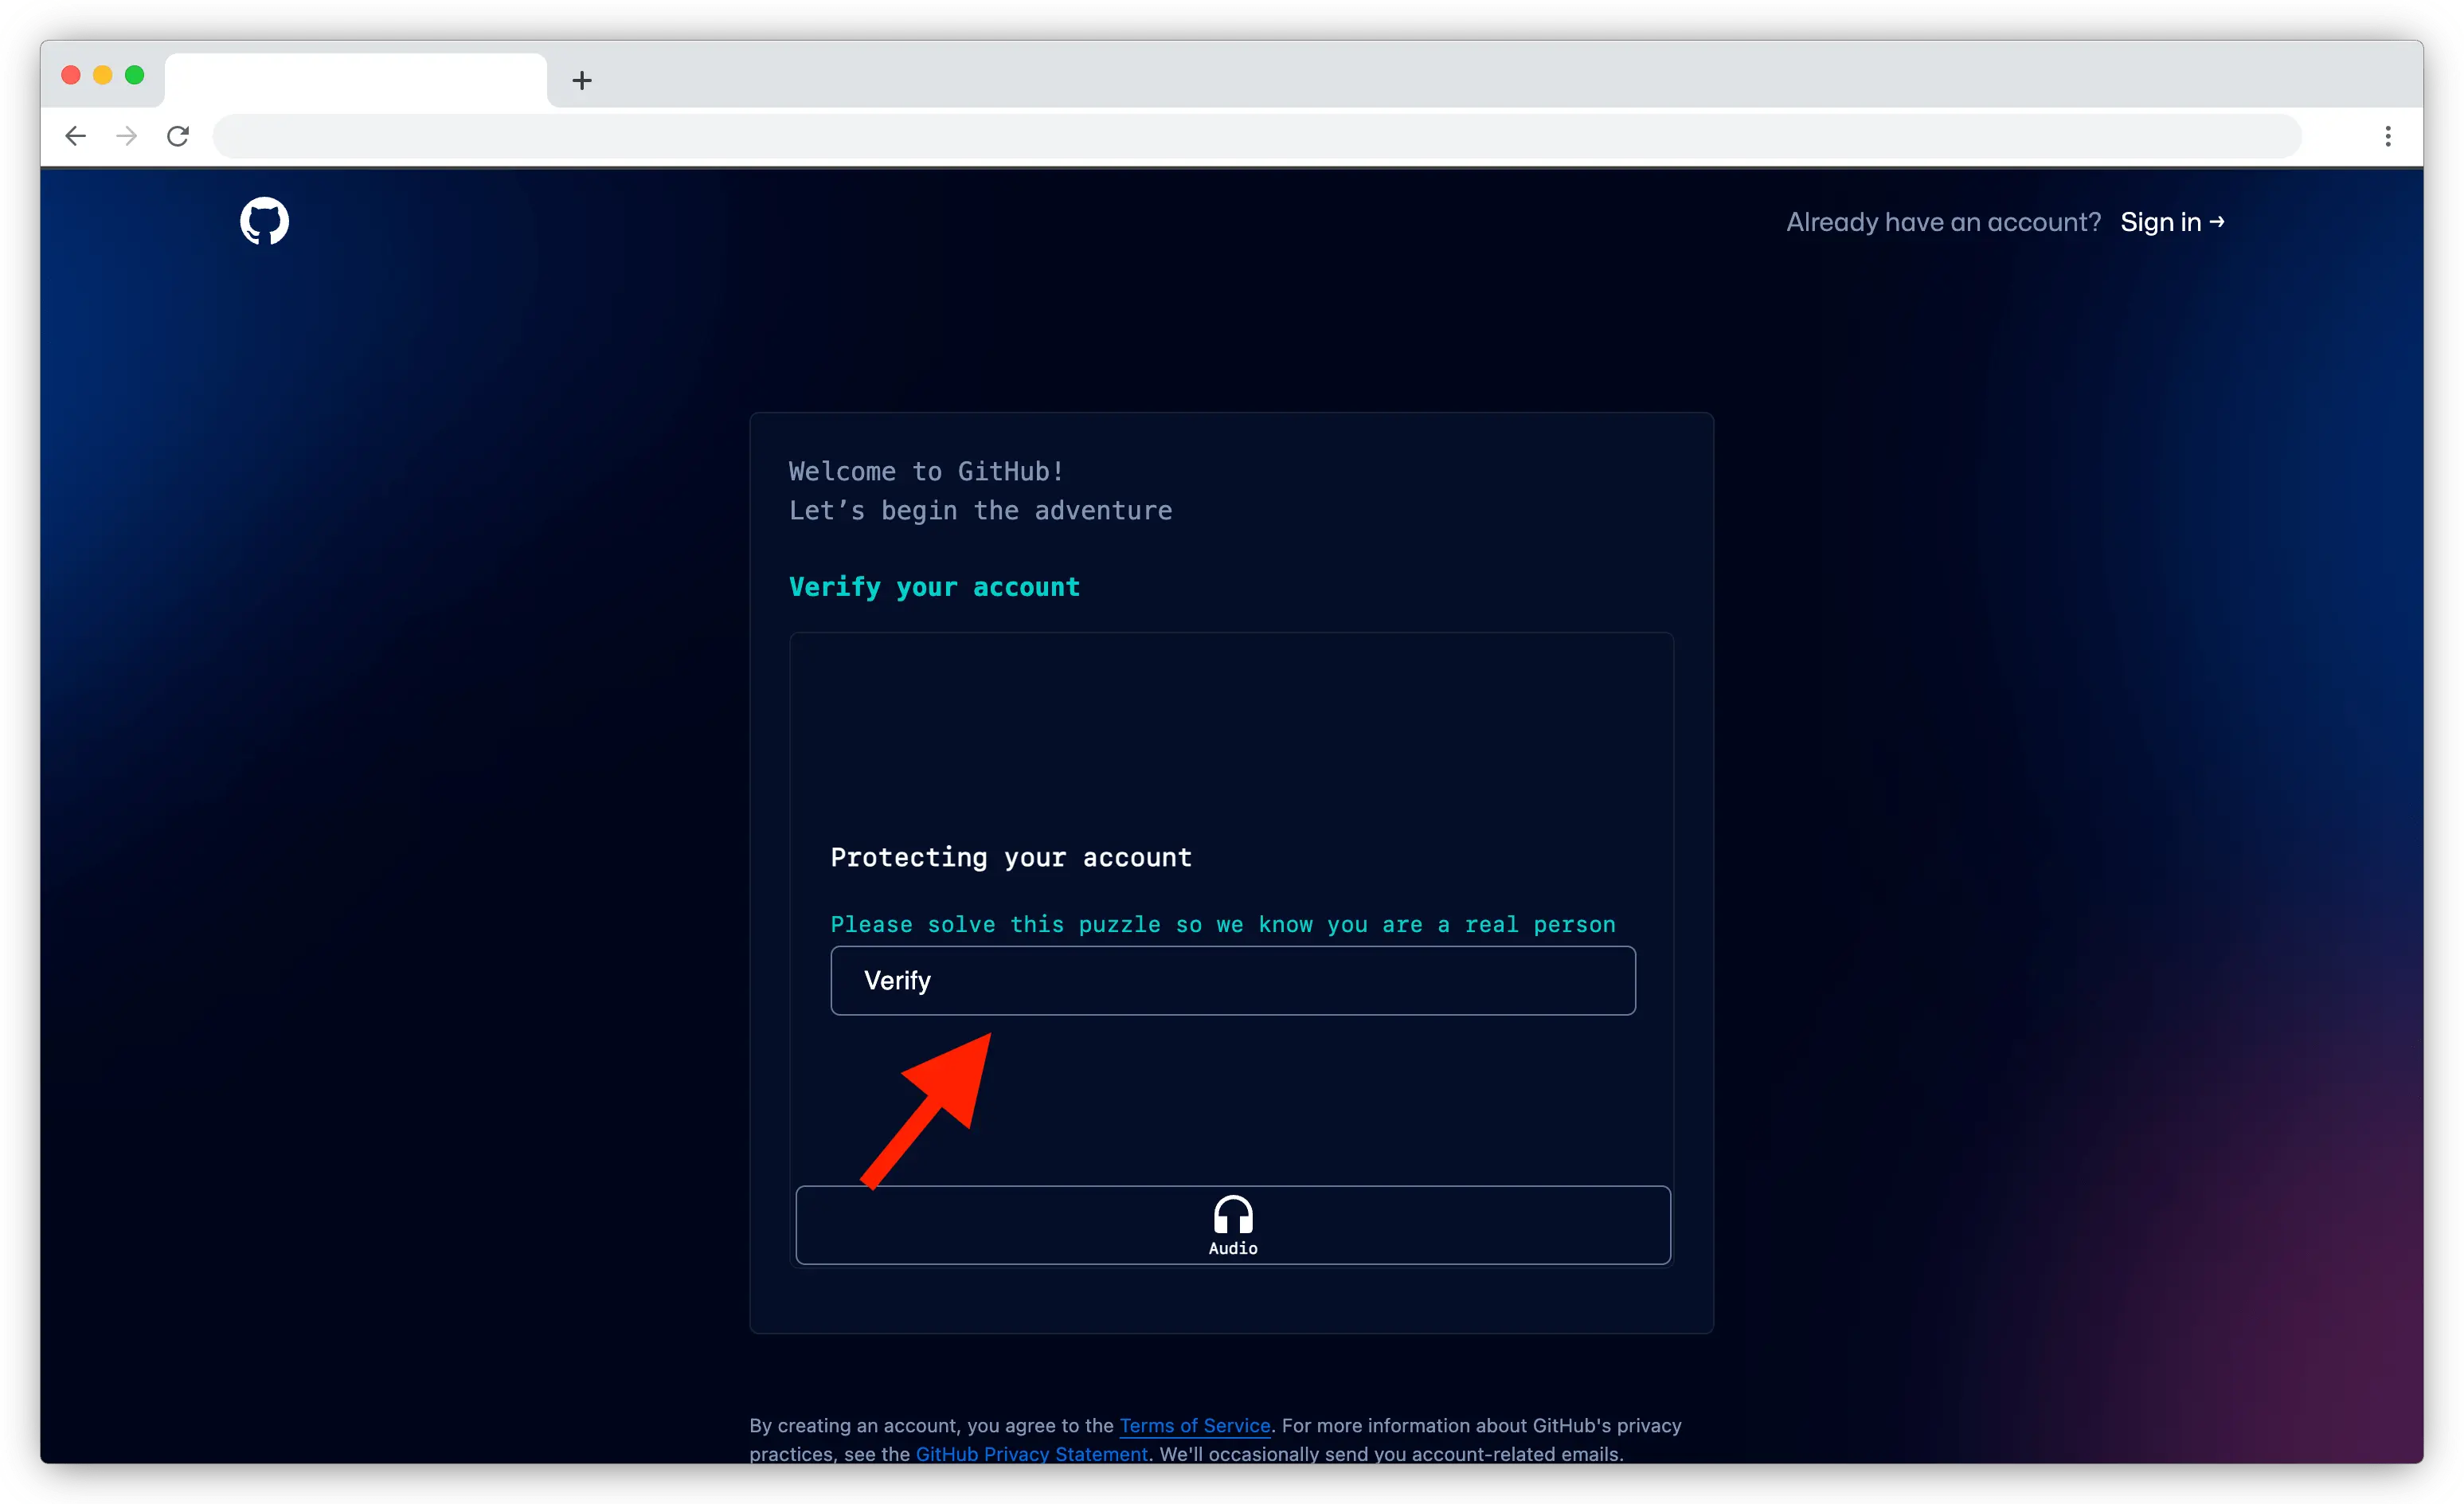
Verify you’re not a robot
Click the “Verify” button to prove you’re human.
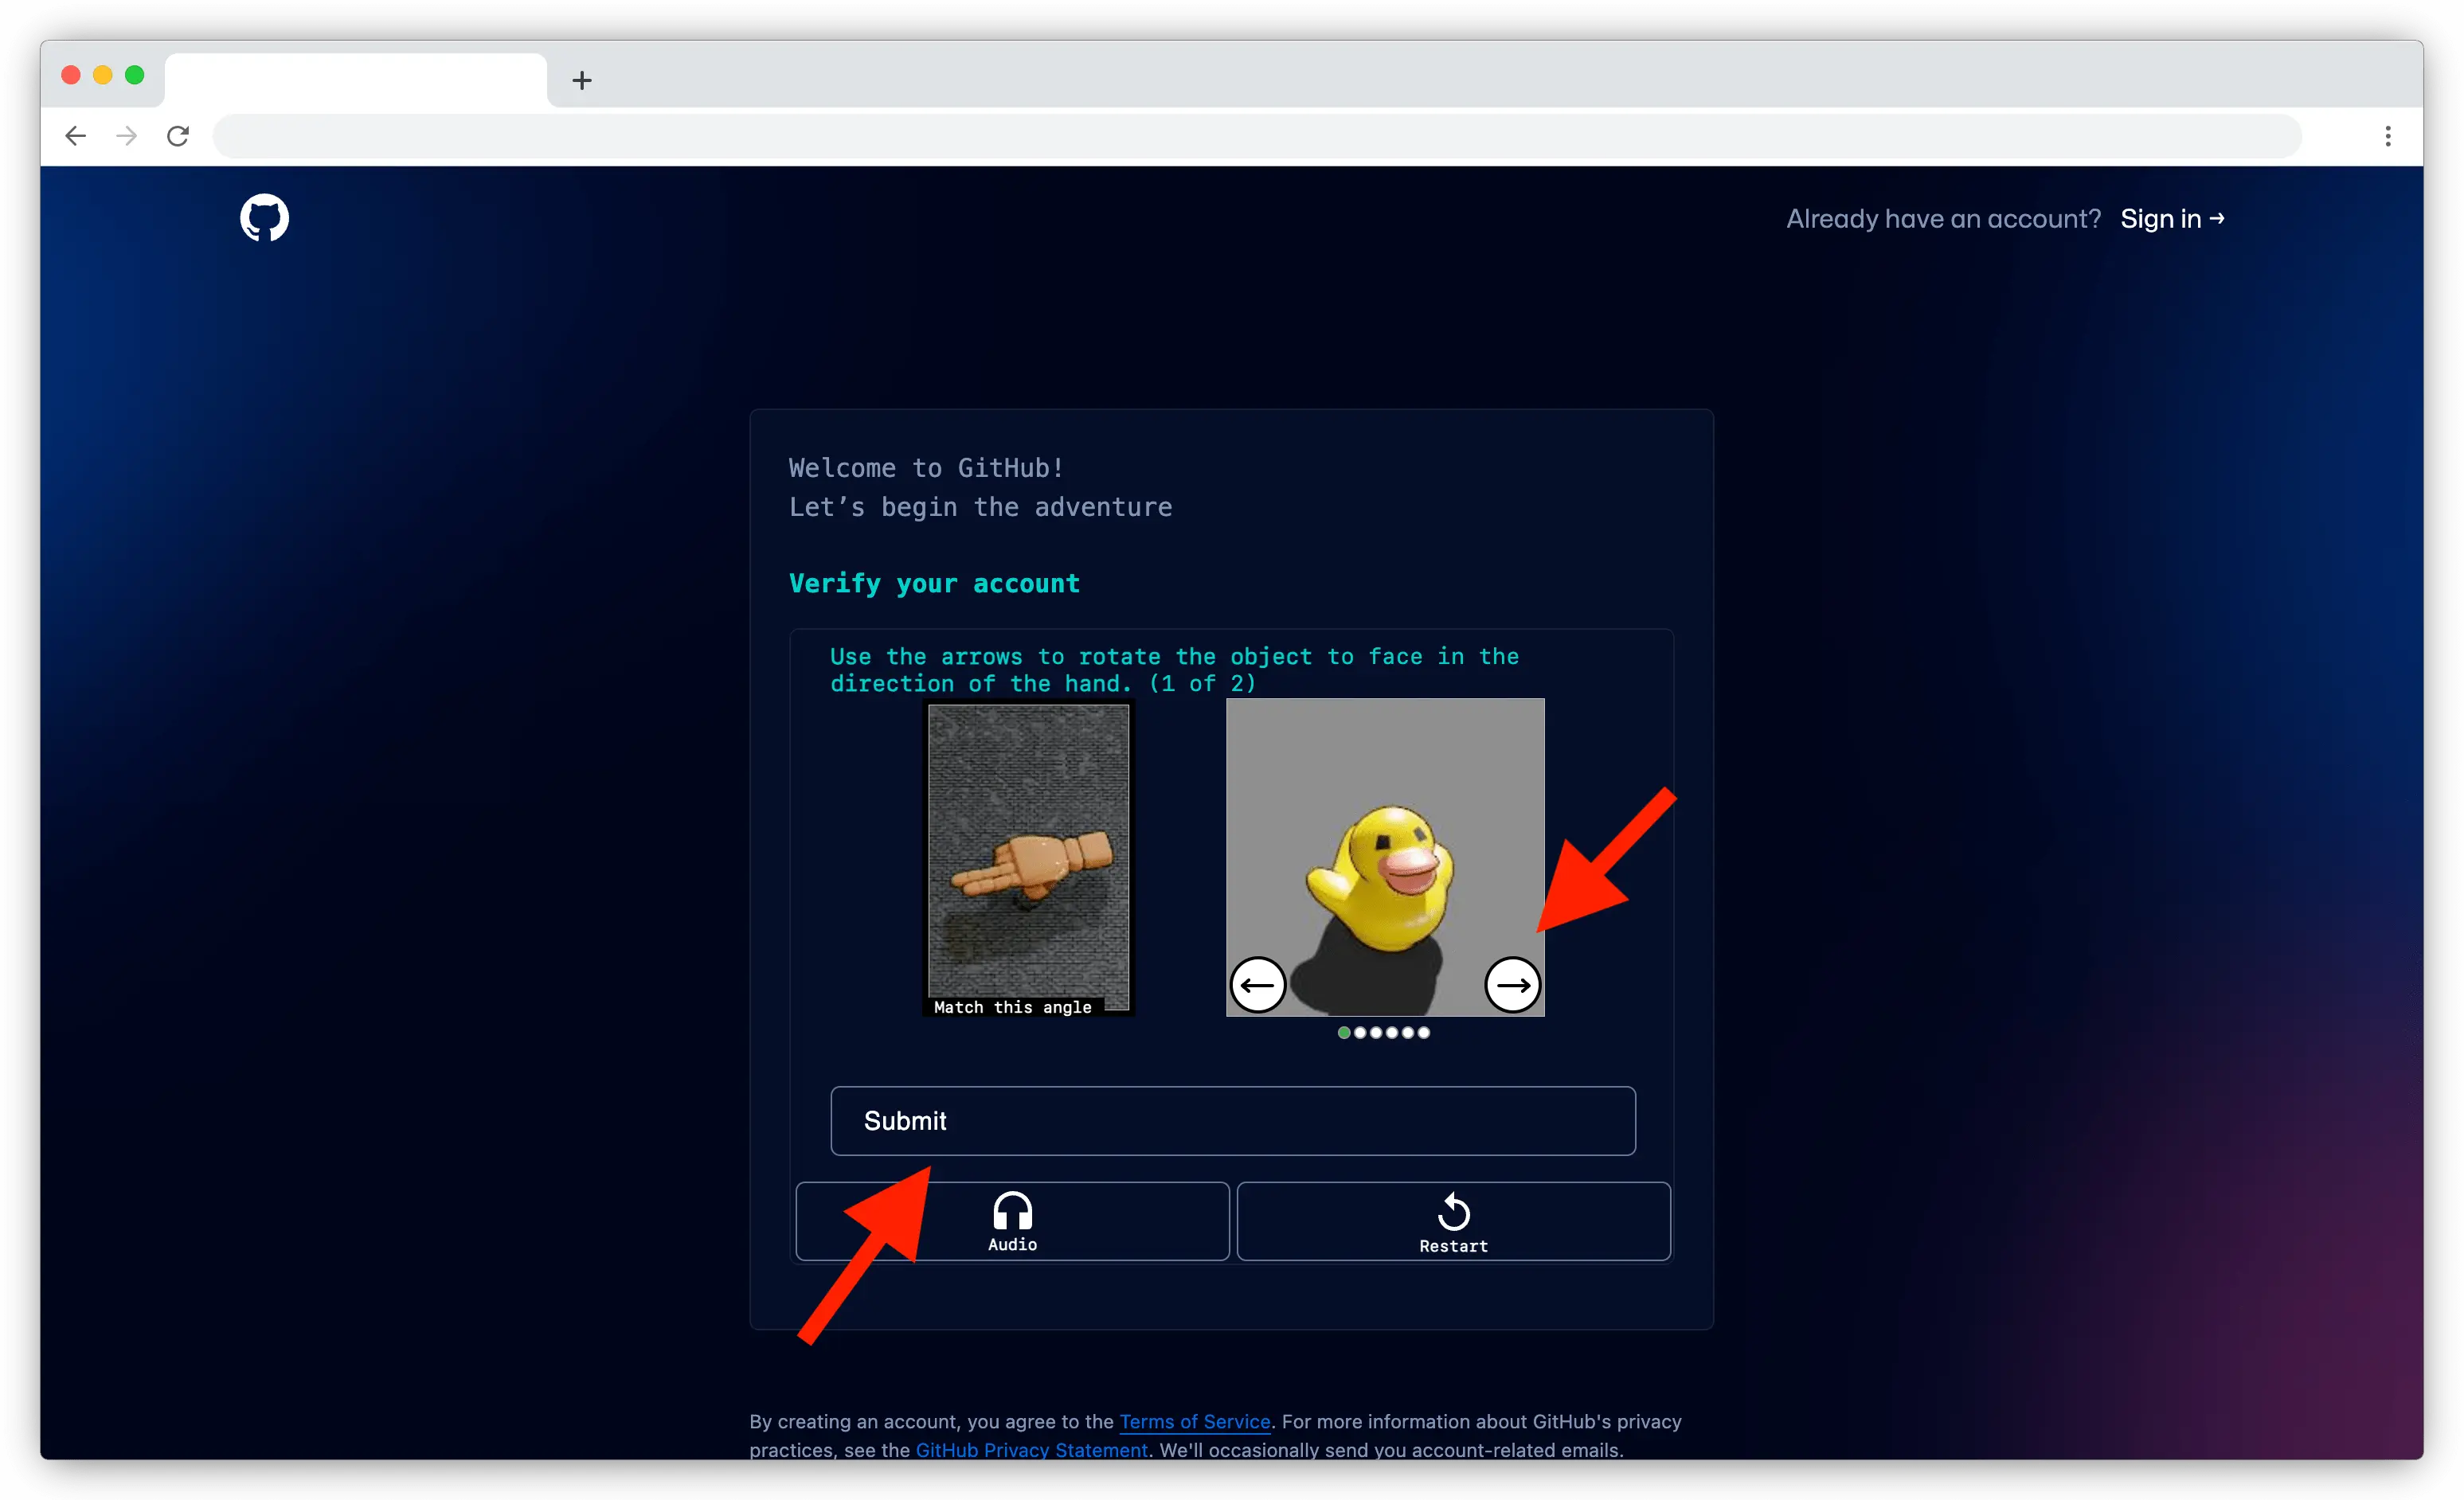
Solve the CAPTCHA
On the next screen, complete the challenge presented (it may vary). Once done, click “Submit”.
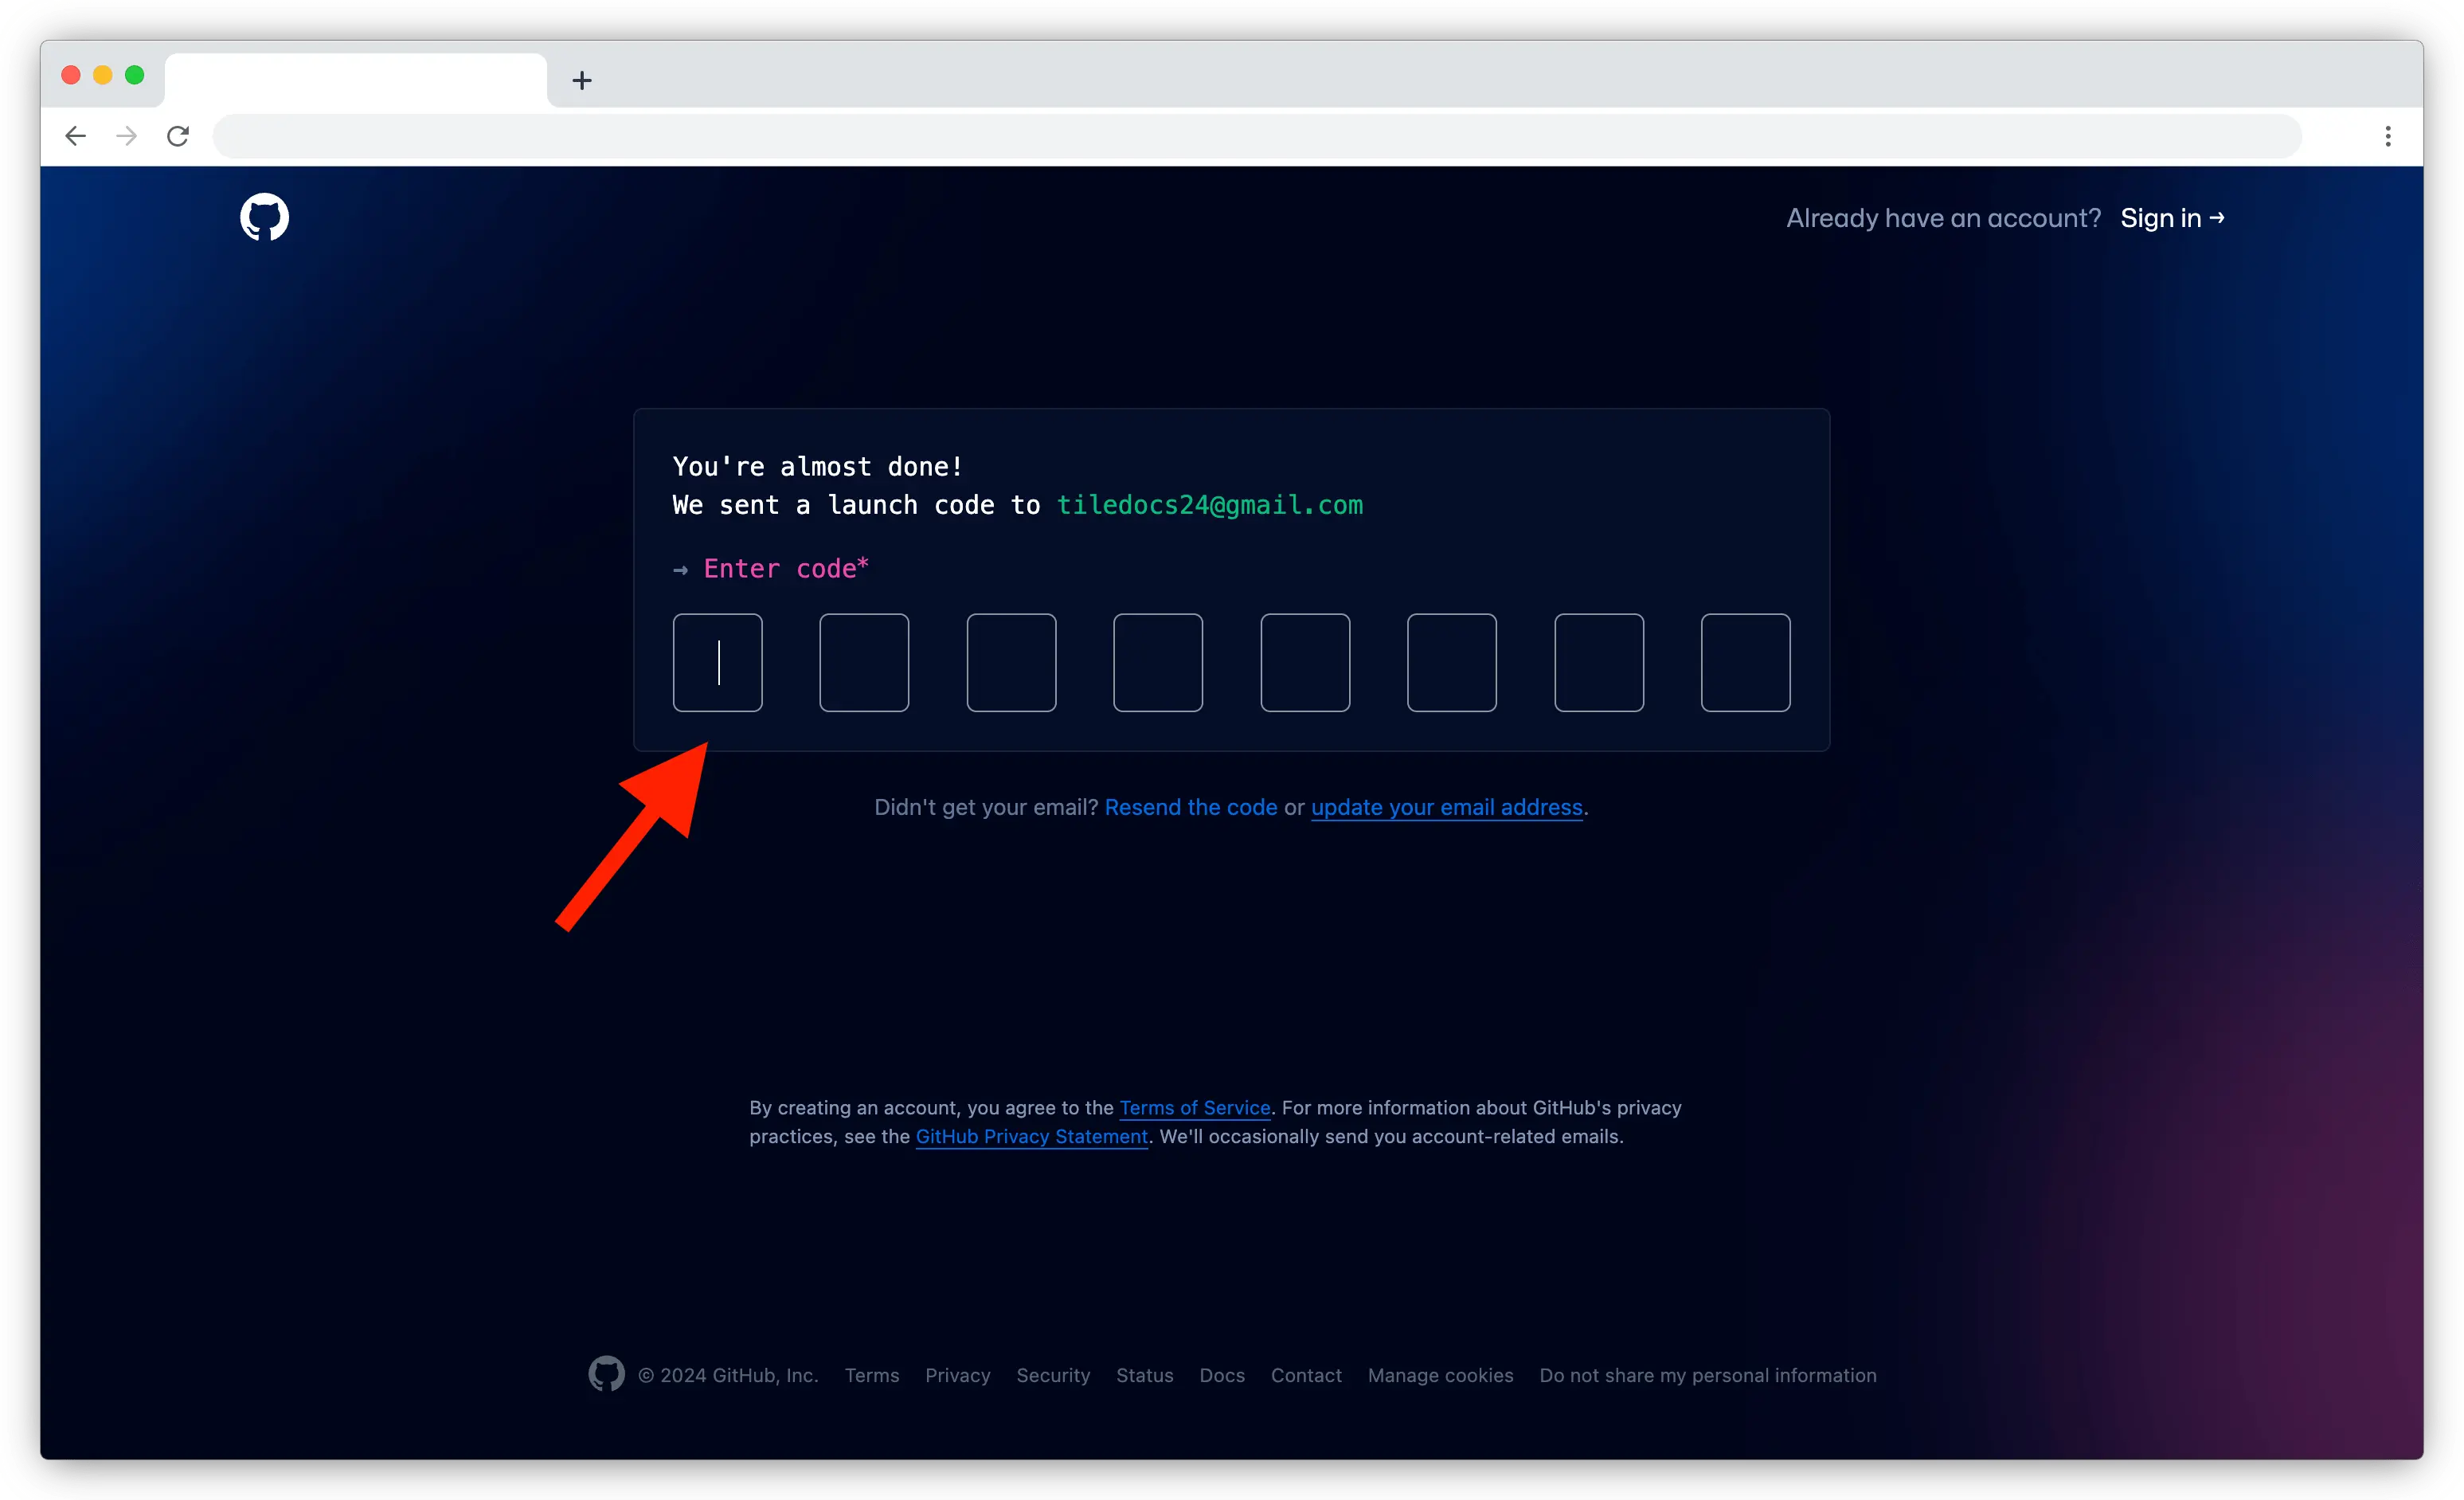
Complete email verification
Open the email address you provided earlier and find the email from GitHub. Copy the verification code from the email and paste it into the field shown on the GitHub page.
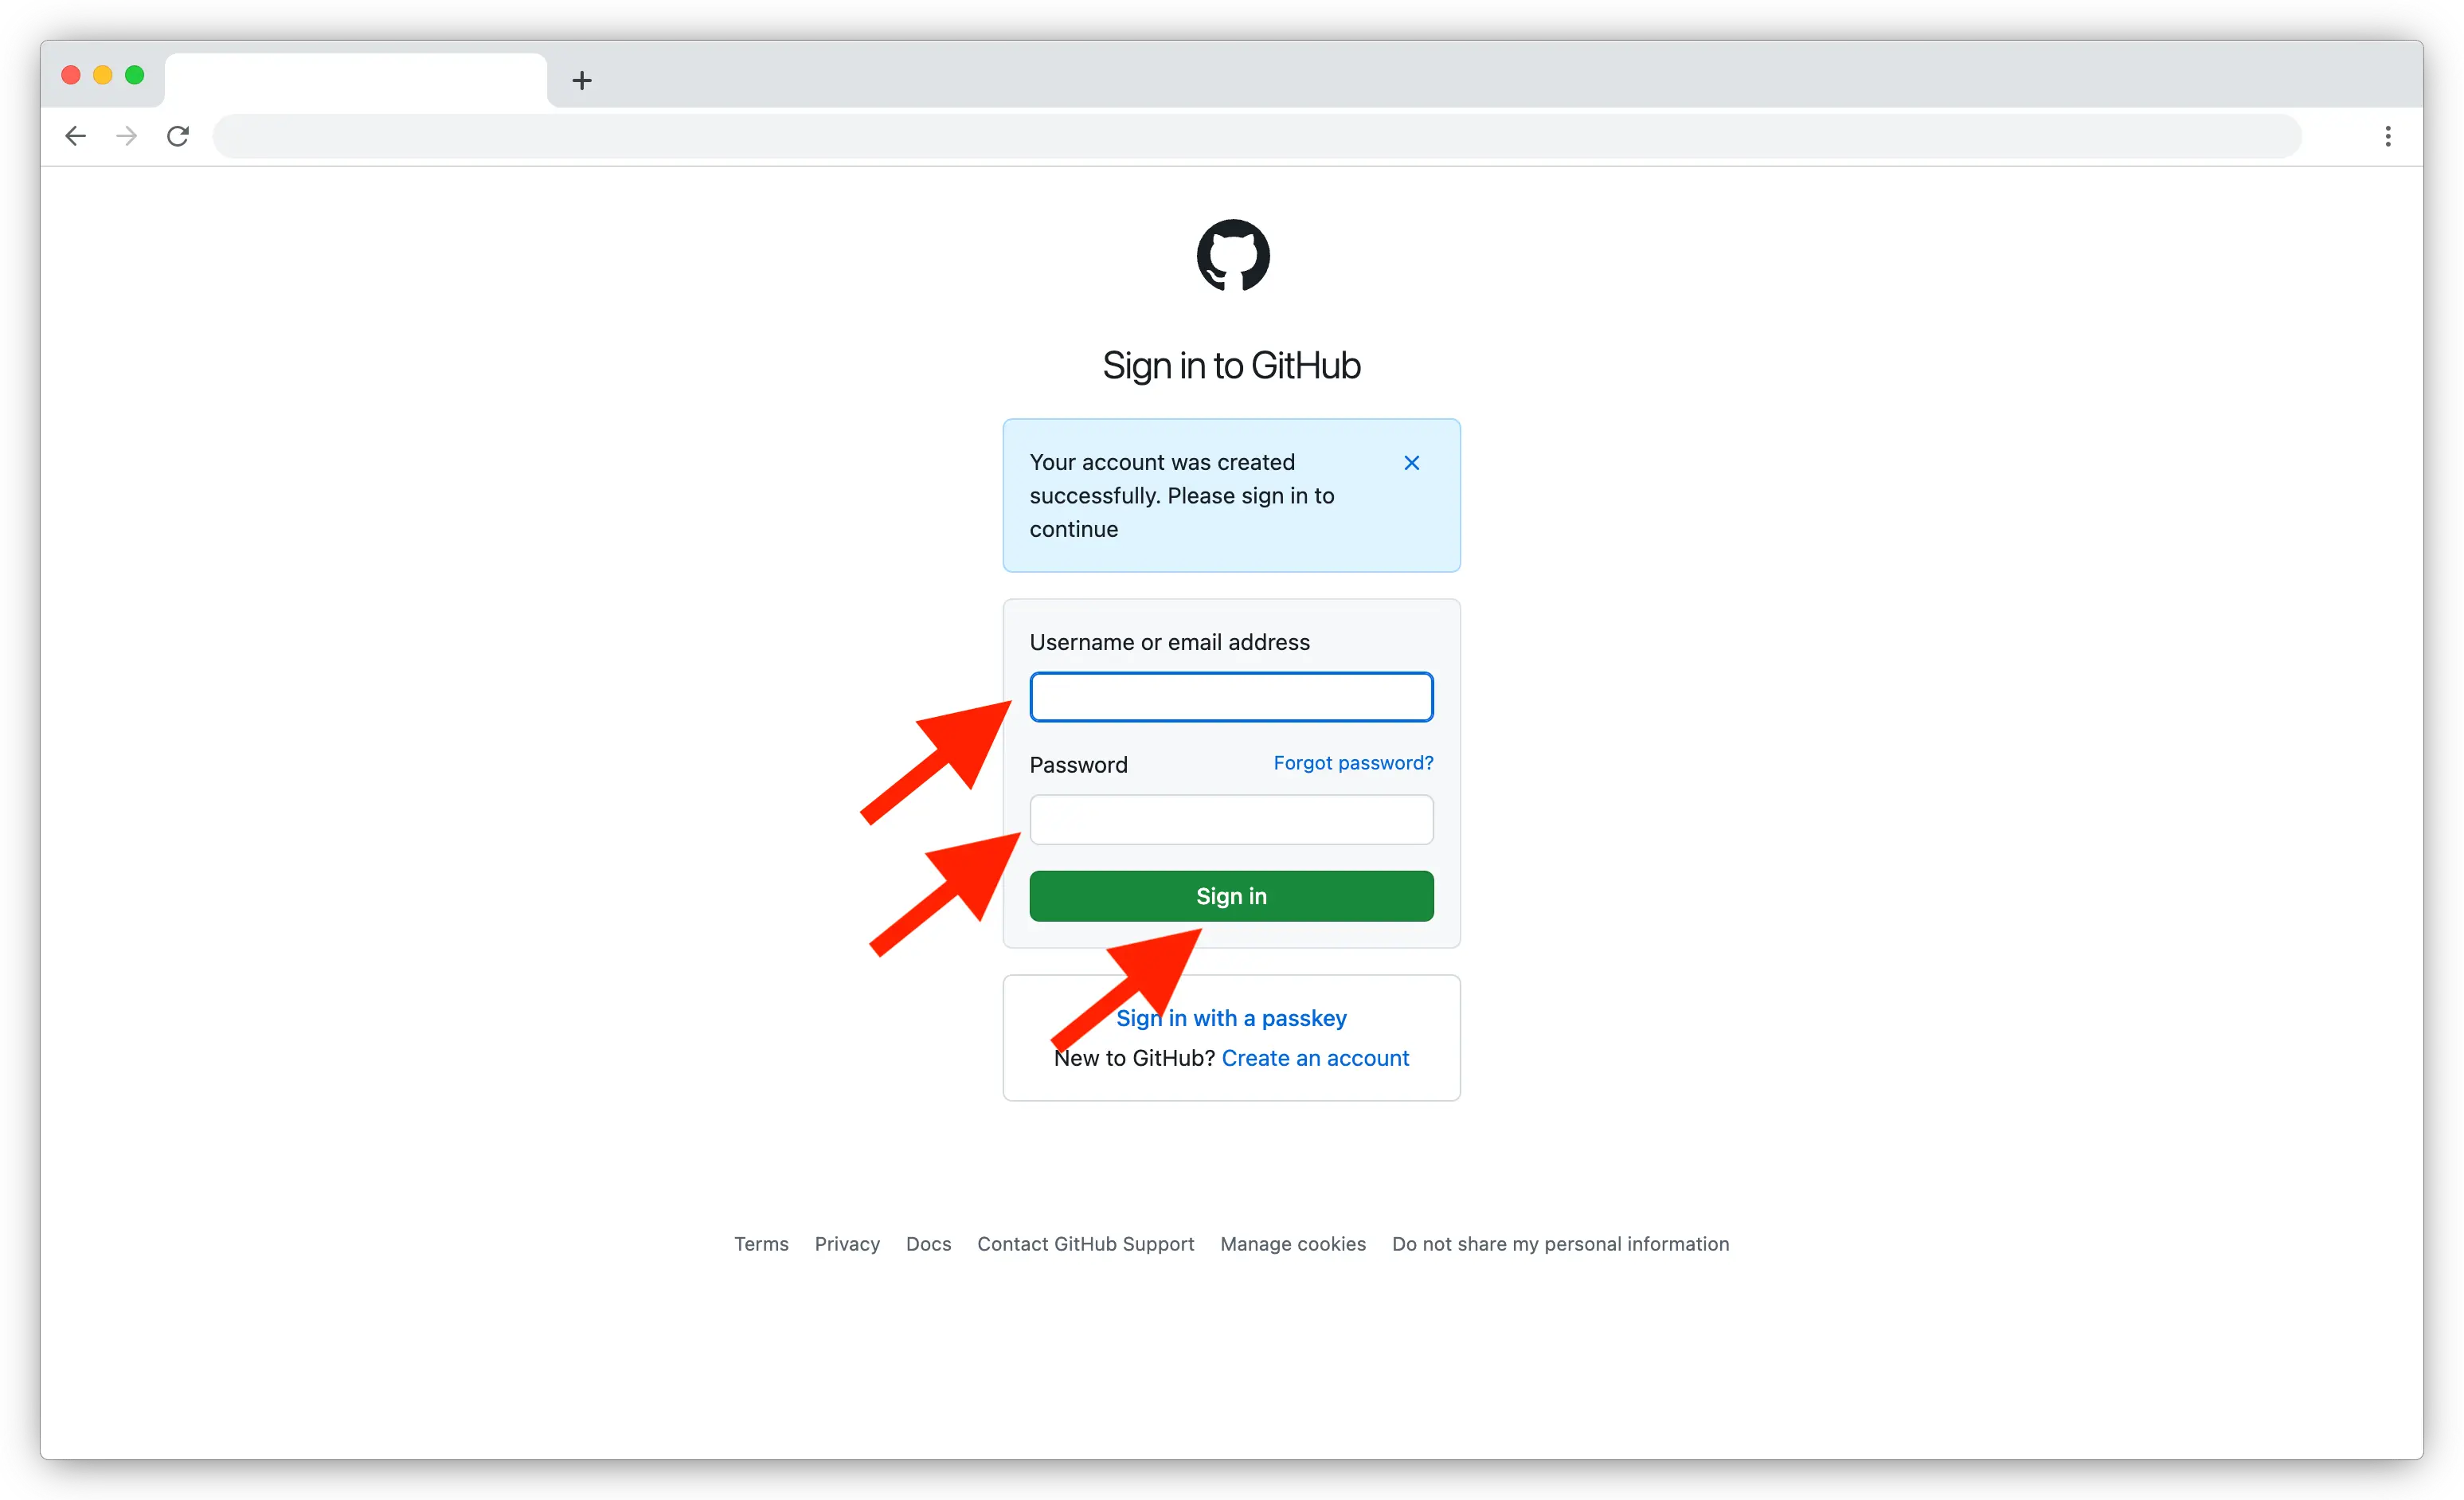
Log in to your account
After verifying your email, log in using your username or email and the password you created.
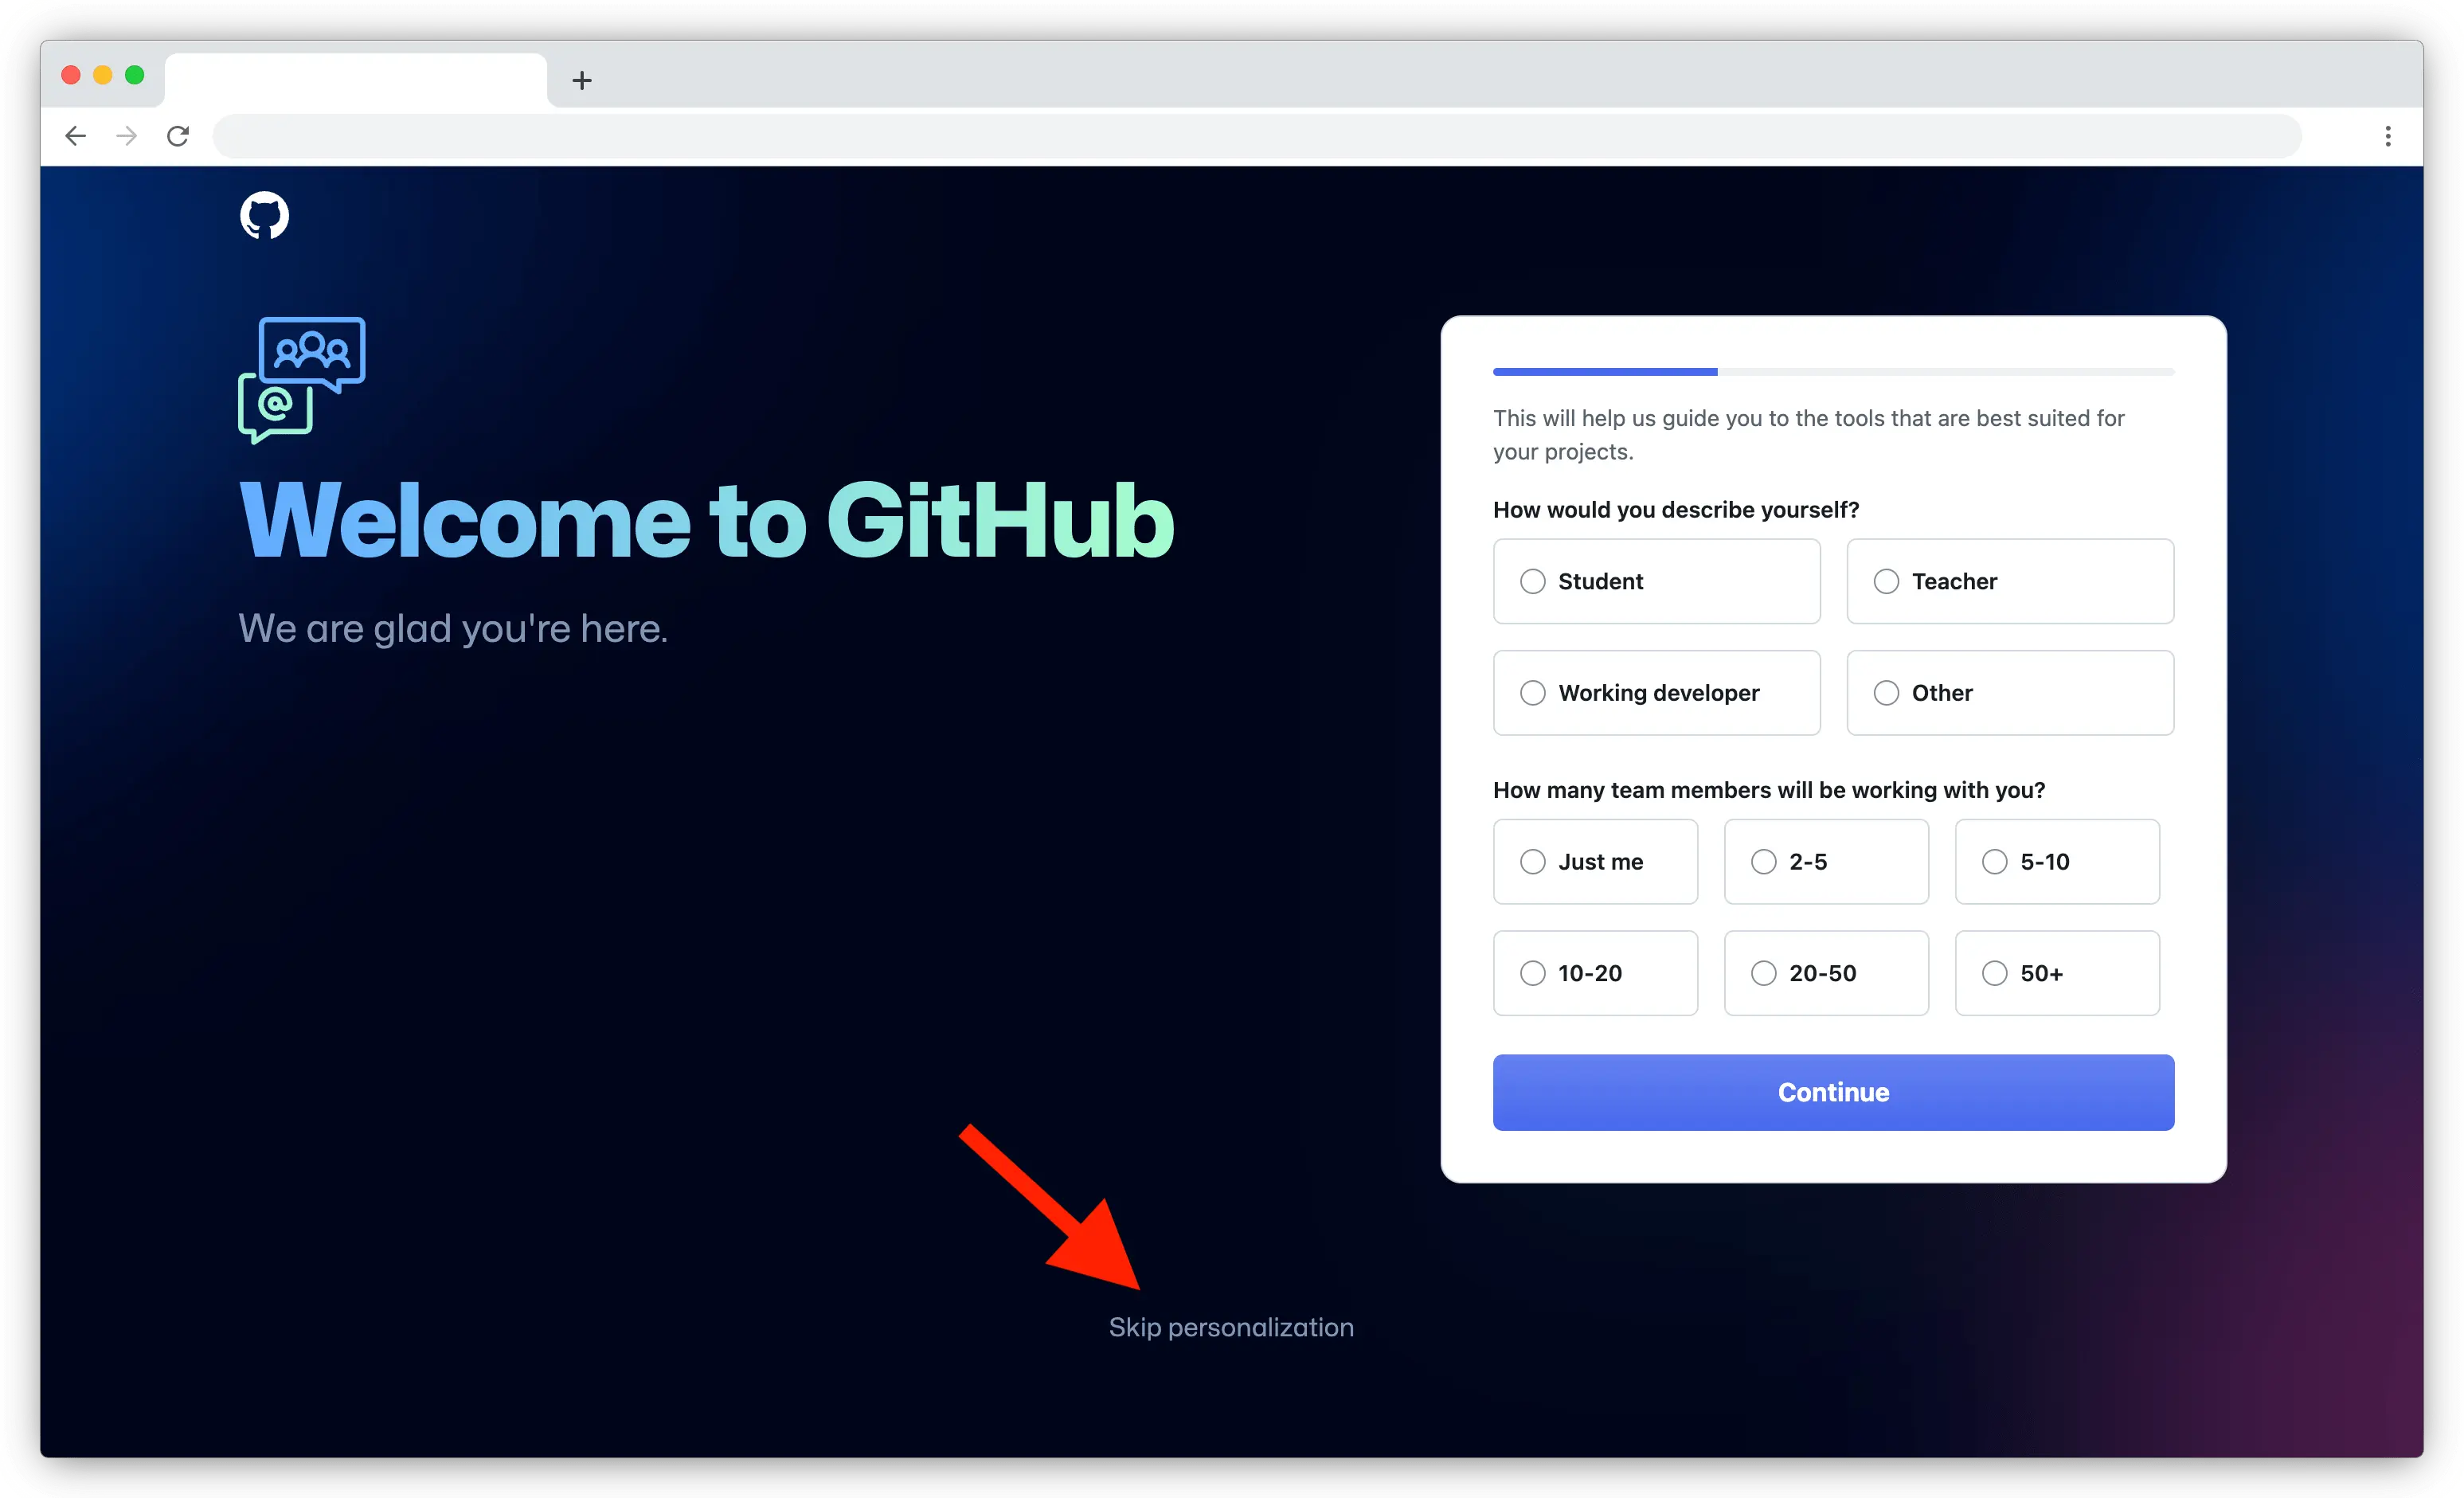
Skip personalization (optional)
You can skip any personalization steps and go straight to your account dashboard.
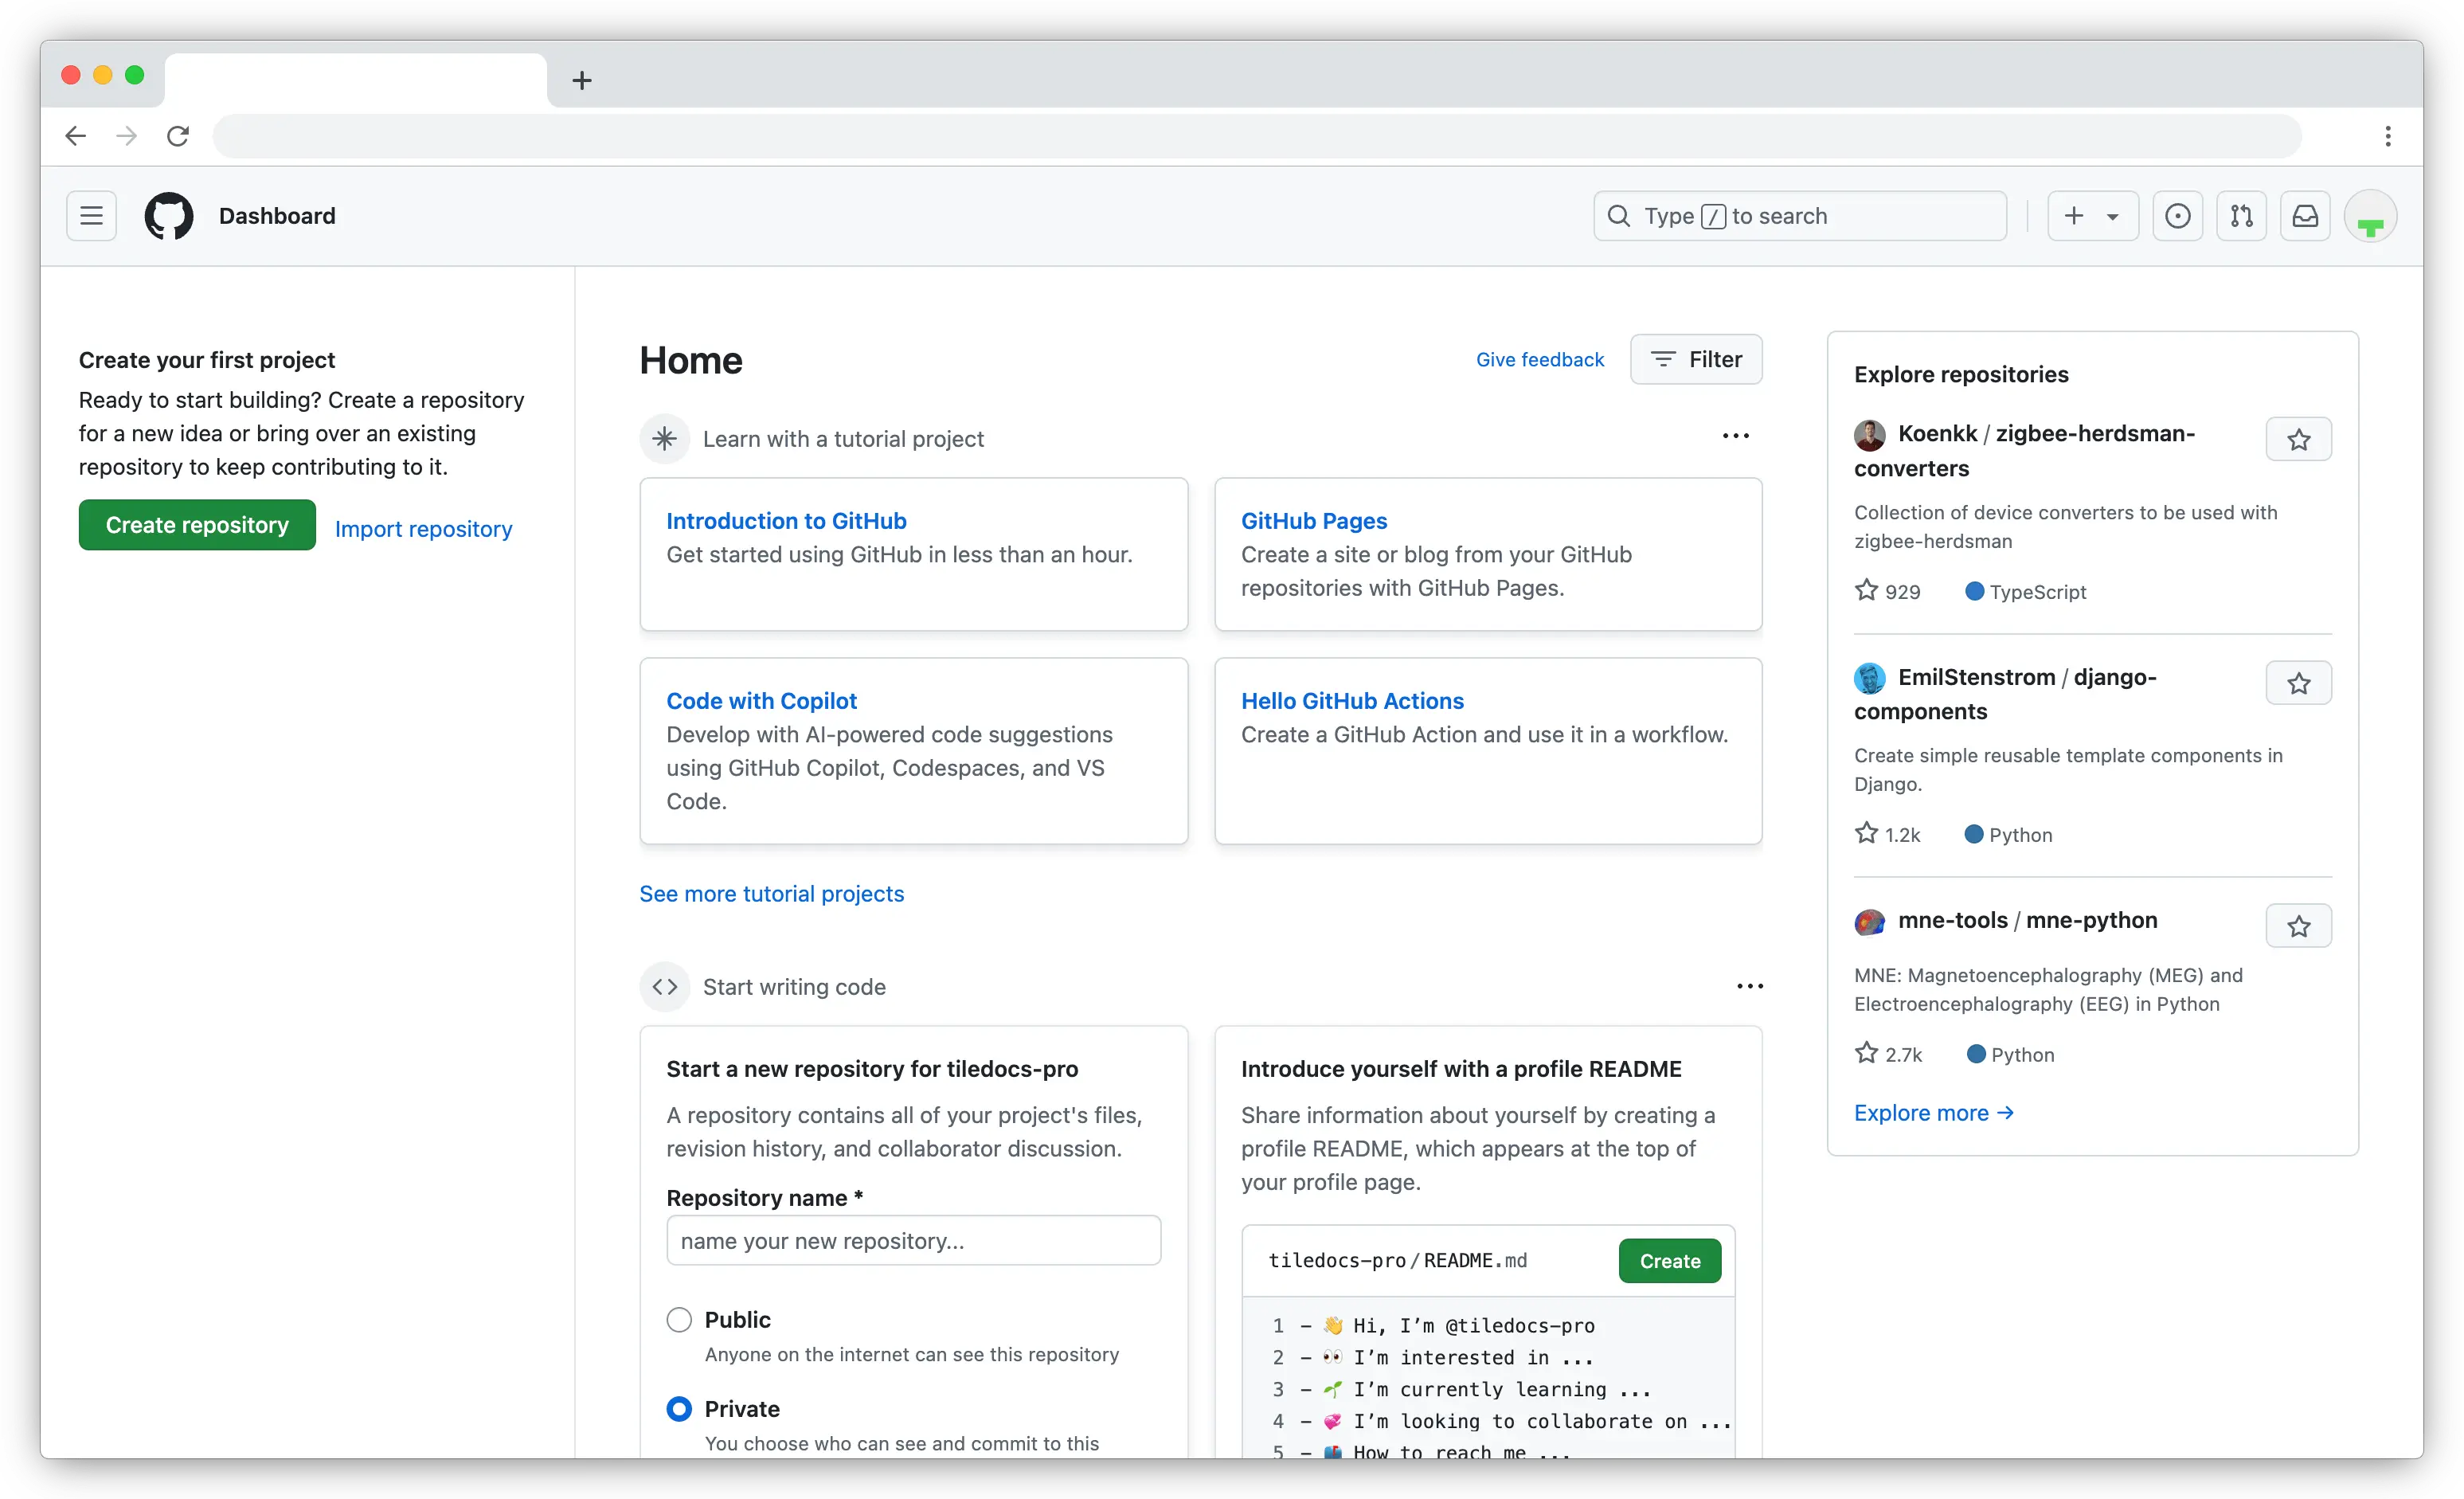
Congratulations! You now have a GitHub account.
Let’s move on to the next step: creating a repository for work.